Before removing the Motherboard, ensure the power is off by checking the indicator light. (See section Before you proceed)
When lit, the onboard LED indicates that the system is ON, in sleep mode or in soft-off mode, not powered OFF.
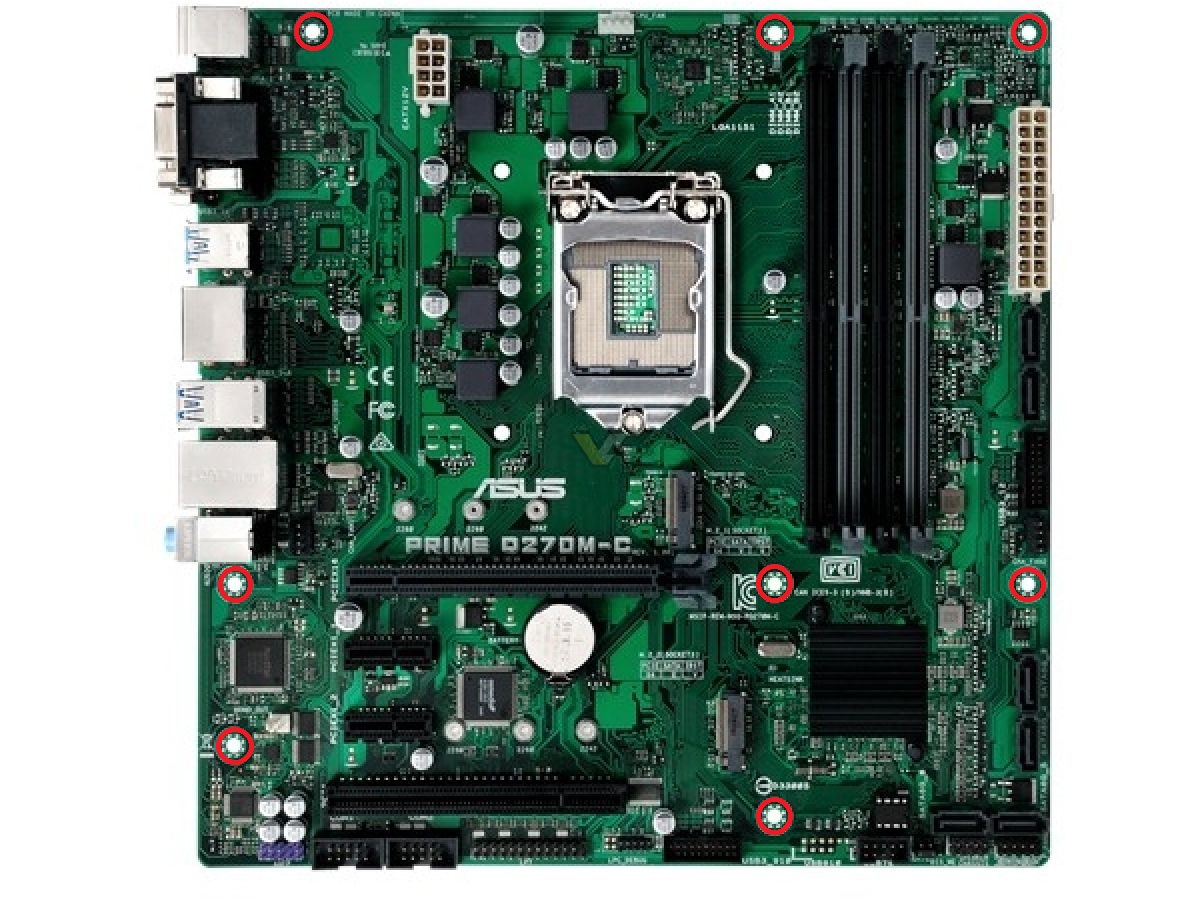
When installing the motherboard, make sure that you place it into the chassis in the correct orientation. The edge with External ports goes to the rear part of the chassis as indicated on the left side of the photo below.

 |
|
 |
|
Unplug the system’s power cable from the back of the unit.
Remove the case cover.(Please see instruction on cover removal Removing the Case Cover)
Disconnect all cables and wires connected to the motherboard and expansion cards
Remove all expansion cards and remove all screws holding the motherboard in place.
Lift the motherboard out by pulling it up and away from the back of the case.
 |
|