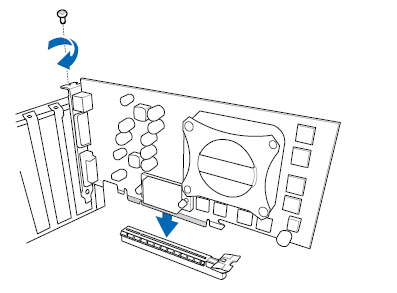
Installing & Removing a PCI Card
PCI and PCI
Express* Auto Configuration
If
you install
a PCI
Express add-in
card
in your computer, the PCI Express
auto-configuration
utility
in
the BIOS automatically
detects and configures
the
resources (IRQs, DMA
channels,
and I/O space)
for that add-in
card. You do not need to run the BIOS
Setup program after you install
a PCI Express
add-in
card.
 |
When
installing a PCI
Express card on the Desktop Board, ensure that
the card is fully seated
in the PCI
Express connector before
you power on
the system.
If
the card is not fully seated in the connector, an electrical short
may result
across the connector
pins. Depending
on
the
over-current protection of
the power supply, certain Desktop Board
components
and/or traces may be damaged. |
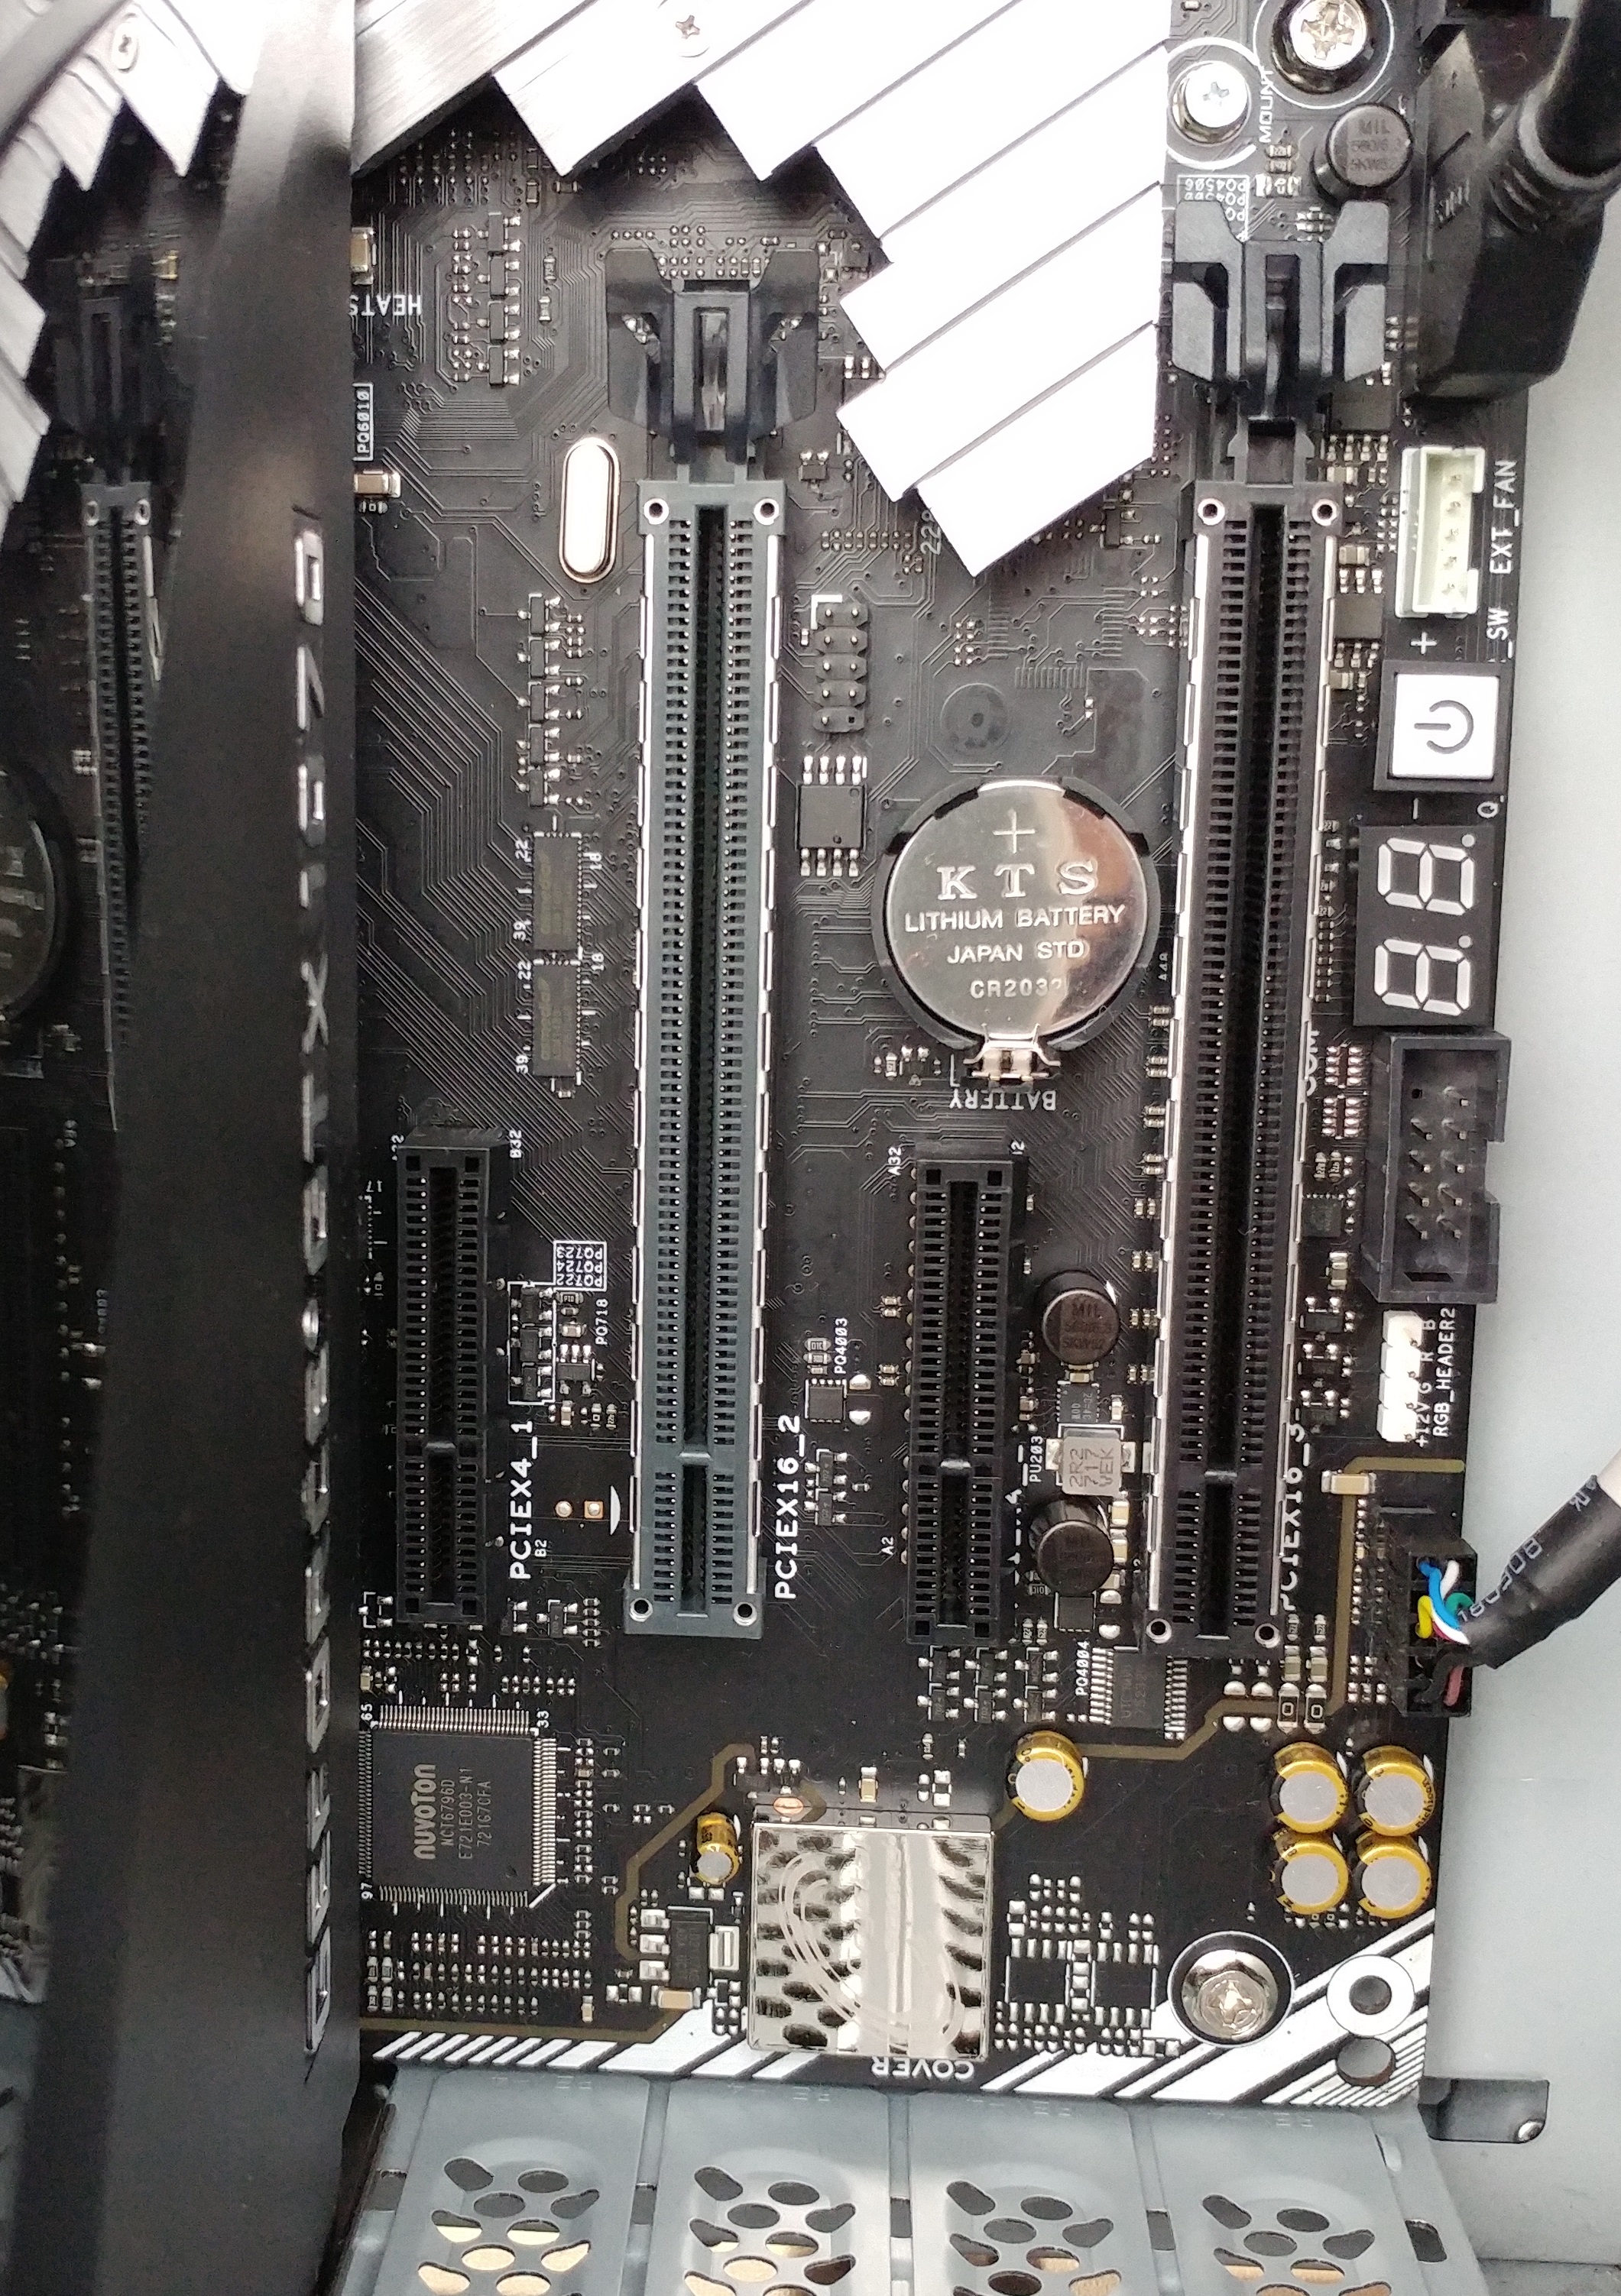
Installing
PCI Express
x16 Graphics Cards
If
you are installing a single PCI
Express x16 graphics card, install it in the PCI
Express primary connector for optimum performance.
Follow these instructions to
install a PCI Express x16
card:
Observe the precautions in "Before
You Proceed" . Place the
card in a PCI
Express x16 connector
and press down
on the card
until
it is
completely seated in
the connector
and the card retention
notch on the
card snaps into place
around the retention
mechanism
pin on the connector. Secure the
card’s metal bracket to the chassis back panel with the retention
mechanism |
 |
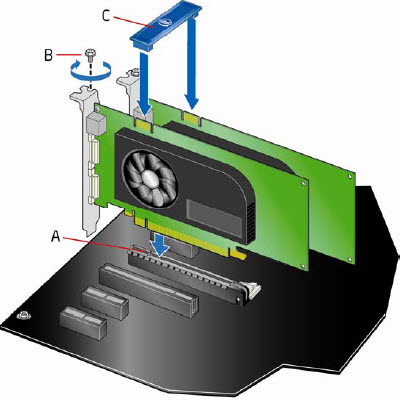
Installing
Linked PCI Express x16 Graphics
Cards
The Desktop Board
supports the use of linked PCI
Express x16 graphics cards with Nvidia
SLI technology
and
AMD CrossFire X technology.
When installing
linked graphics cards in the PCI
Express x16 connectors, refer to the card manufacturer’s
instructions to determine correct card placement and interconnection.
To install two or three linked PCI
Express graphics cards:
Observe
the precautions in "Before
You Proceed". Install
the first card in the PCI
Express x16 connector as described in “Installing
PCI Express
x16 Graphics Cards” Place
the second
card in the secondary PCI
Express x16 connector
(A)
and
press
down
on
the card
until
it
is
completely
seated
in
the connector
and
the
card retention
notch
on the card snaps
into
place
around the
retention
mechanism
pin
on the
connector.
Do the same for the third card. Secure
the card’s metal bracket to the chassis back panel with a
screw (B) or the retention mechanism. Connect the
two or three cards together with the SLI or CrossFire bridge
(C) as shown. Connect the
monitor cable to the graphics
cards according to the manufacturer’s instructions. |
 |
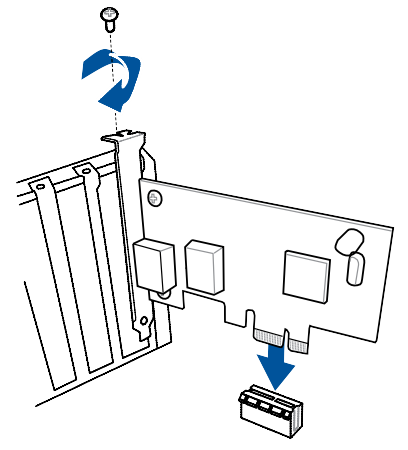
Installing PCI Express x1 Cards
While there are some graphics cards that
are PCI Express x1, most cards that fit in this slot are Network
adapter cards or SATA, USB, Serial or Parallel controller cards.
If you are installing a single
PCI
Express x1 card, install it in the PCI
Express primary connector for optimum performance.
Follow these instructions to
install a PCI Express x1
card:
Observe
the precautions in "Before
You Proceed" . Place the
card in a PCI
Express x1 connector
and press down
on the card
until
it is
completely seated in
the connector
and the card retention
notch on the
card snaps into place
around the retention
mechanism
pin on the connector. Secure
the card’s metal bracket to the chassis back panel with the
retention mechanism |
 |
