
Before installing or removing a processor, make sure the AC power has been removed by unplugging the power cord from the computer; the standby power LED should not be lit. Failure to do so could damage the processor and the board.
|
Before installing or removing a processor, make sure the AC power has been removed by unplugging the power cord from the computer; the standby power LED should not be lit. Failure to do so could damage the processor and the board. |
To install a processor, follow these instructions:
Observe the precautions in "Before You Proceed".
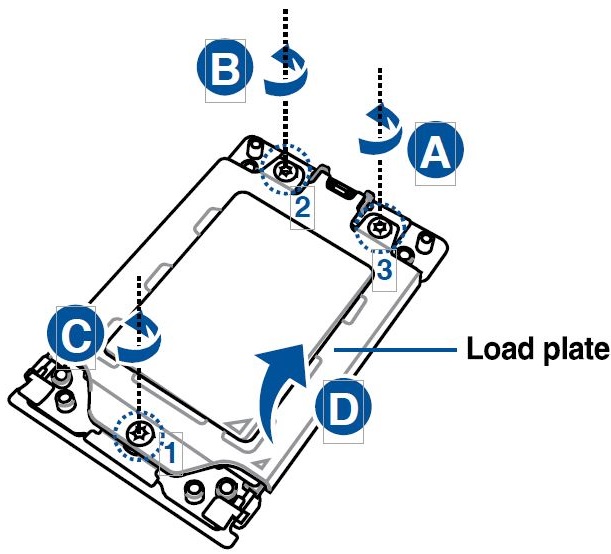
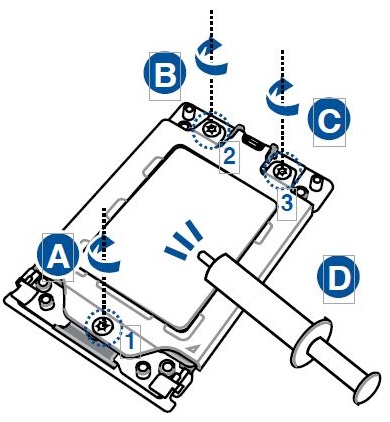
Using a Torx screwdriver, remove the screws in sequence 3>2>1, then lift the load plate.
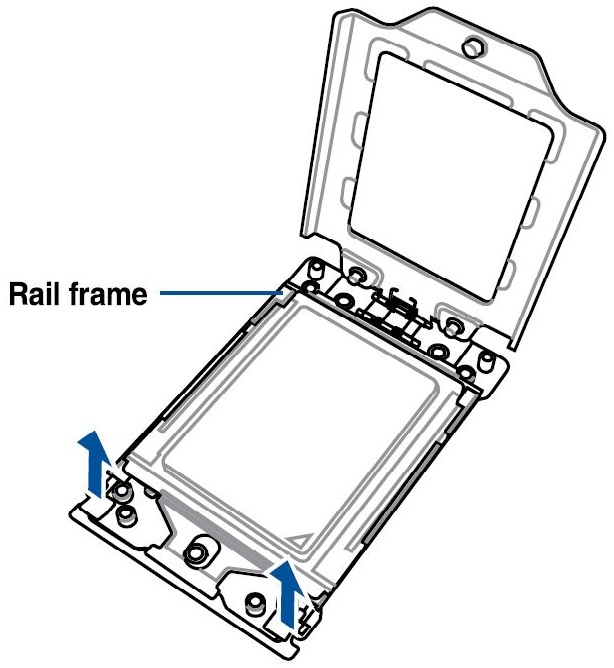
Use your fingers to pull up the tabs on both sides of the rail frame to release and lift to its fully open position.
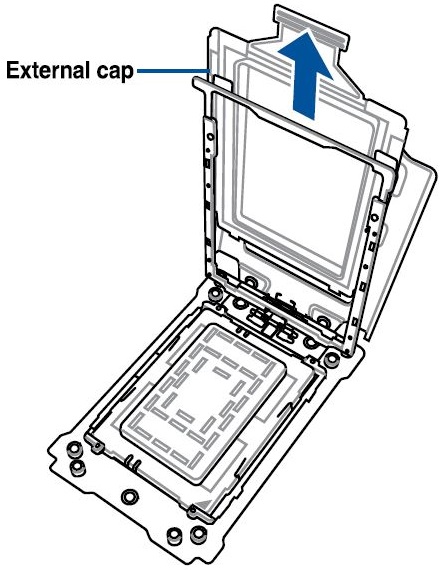
Remove the external cap.
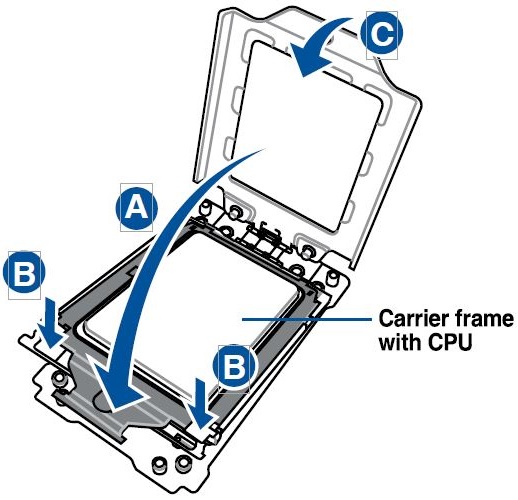
Slide the carrier frame with CPU into the rail frame until you hear a click sound, then remove the PnP cap.

Gently press down the rail frame until it latches to the socket housing, then press down the load plate.
Slightly drive the three screws into the holes in sequence 1>2>3, just enough to attach the load plate to the socket. When the three screws are attached, tighten them in sequence 1>2>3 to completely secure the load plate. Then apply the Thermal Interface Material to the CPU.
 |
|
 |
|